Django and GitLab - Running Continuous Integration and tests with your FREE account
11 May 2016This article attempts to explain how to setup your Django project so you can leverage GitLab.com’s free Continuous Integration features - available on their hosted environment, for their free account tier, on top of unlimited private repositories!
The TLDR version is:
You push your changes to a remote “dev” branch and GitLab will:
- Read a very simple config file.
- Build your environment on their cloud.
- Run your tests - including PhantomJS Integration tests - on this environment.
- Mark the build as “successful” if all tests pass.
See the “References” section if you need more complicated options, because this is intended to be pretty basic.
Pre-requisites
-
You have to have an account on GitLab.com.
-
Your Django project should have scripts describing how to set it up and install its dependencies (I used Pydanny’s excellent Cookiecutter-Django project template, but I’ll go into a little more detail ahead).
-
It also needs to have some automated unit or integration tests (check my Ready to use Structure for Django Tests + Examples entry for some ideas).
Configuration
First thing we need to do is to tell the GitLab Runner what it should do whenever you push code to your repository.
This is done in a file called .gitlab-ci.yml that has to be saved in your project’s root directory:
image: python:3.5

all_tests:
  script:
   - sh ./sh_scripts/install.sh
   - python3 manage.py test -k
  when: on_success
  only:
    - dev
Going line by line, here’s what we are doing:
image: python:3.5 - Tells the runner which Docker Image to use.
I had to choose
python:3.5because thedjango:1.8.3image was failing when installing some dependencies (took me a while to figure that out too). Django is in the project’s list of requirements anyway, so it’s nice to be able to define which version of Python I want.
all_tests: - This is just an arbitrary definition of a stage (I copied it from one of Gitlab’s examples).
` script:` - Here I’m grouping all the actions that the runner is to perform in this stage, as follows:
` - sh ./sh_scripts/install.sh` - This is the Shell Script that provisions the Docker machine, installing dependencies, running pip to install requirements and setting up PhantomJS - the headless browser we use to run integration tests (see examples ahead).
` - python3 manage.py test -k` - If the previous step is successful, this will simply use Django’s test runner to run all tests defined within the project (the “-k” switch tells Django to keep the test database across tests, speeding things up a bit.)
` when: on_success` - Tells the runner that the actions should only run when the previous one succeeded.
only: and - dev - Tells the runner to run this stage only if the push was made to the “dev” branch.
The reason for that is just a personal choice for the moment, but I left it in the article as it shows how you can perform different actions depending on what branch code is being pushed too - you can also omit it completely if you want things to run regardless of branch.
Going for a Run
Assuming you add a similar .gitlab-ci.yml to your project and pushed the committed changes to “dev”, you should be able to go to GitLab’s Dashboard for your project, click on the “Builds” tab and see a new “pending” or “running” build on your list.
Click on the build, and when the status changes to “running”, you should see a console-like display showing what’s going on:
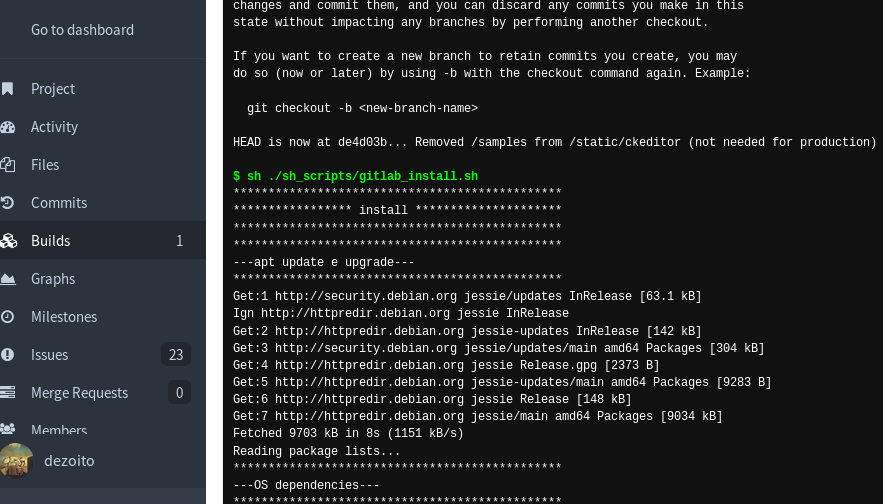
I think it’s a good idea to follow it closely during the first runs, so you can see any problems and error messages that may pop up along the way.
Failed?
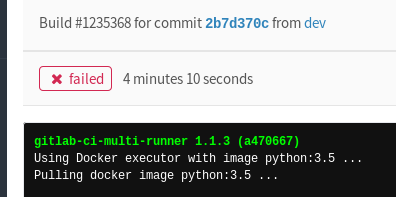
Sometimes your build will fail not because there’s anything wrong with your scripts or tests, but because the docker machine wasn’t able to download and install some dependency - pay attention to the job execution and rerun the build if you think that was the case.
I’ve had builds that would fail three or four times in a row, then “automagically” work a few minutes later - this can be frustrating when you are just trying to get started.
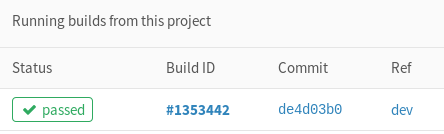
Success?
After some troubleshooting and bearing no inaccessible dependency hosts, you should see something indicating that your project was built and all tests passed:
Install Script Example
Here’s a redacted example of the script I use to install all OS, Python and Django dependencies, along with PhantomJS - You should probably be using similar if you are using Docker or Vagrant.
` - sh ./sh_scripts/install.sh`
#!/usr/bin/env bash
echo "***********************************************"
echo "***************** install *********************"
echo "***********************************************"

echo "***********************************************"
echo "---apt update e upgrade---"
echo "***********************************************"
apt-get -y update

echo "***********************************************"
echo "---OS dependencies---"
echo "***********************************************"
apt-get -y install python3-pip
apt-get -y install python3-dev python3-setuptools
apt-get -y install git
apt-get -y install supervisor
# .....
# .....
# .....
# .....

echo "***********************************************"
echo "---install dependencies (including django)  ---"
echo "***********************************************"
pip install --upgrade pip
pip install -r requirements.txt

echo "***********************************************"
echo "--- PhantomJS (for tests)                   ---"
echo "***********************************************"

if [[ $EUID -ne 0 ]]; then
    echo "This script must be run as root" 1>&2
    exit 1
fi

PHANTOM_VERSION="phantomjs-1.9.8"
ARCH=$(uname -m)

if ! [ $ARCH = "x86_64" ]; then
    $ARCH="i686"
fi

PHANTOM_JS="$PHANTOM_VERSION-linux-$ARCH"

# apt-get update
apt-get install build-essential chrpath libssl-dev libxft-dev -y
apt-get install libfreetype6 libfreetype6-dev -y
apt-get install libfontconfig1 libfontconfig1-dev -y

cd ~
wget https://bitbucket.org/ariya/phantomjs/downloads/$PHANTOM_JS.tar.bz2
tar xvjf $PHANTOM_JS.tar.bz2

mv $PHANTOM_JS /usr/local/share
ln -sf /usr/local/share/$PHANTOM_JS/bin/phantomjs /usr/local/bin
echo "--- PhantomJS Finished          ---"

echo "***********************************************"
echo "--- Sone Installing Stuff                   ---"
echo "***********************************************"

pip freeze
Some tips:
-
I like to add some attention starved “echo” statements before each section of my install script, making things easier to follow during the build process..
-
The
pip freezestatement at the end of the script is there so I could see which python dependencies were actually installed up to the point where the build failed. -
Using PhantomJS is easier (and, IME faster) than using headless Firefox to run integration tests - I wrote an entry on how to run Integration Tests with Selenium and PhantomJS, if you need help with that.
References
Setting up GitLab Runner For Continuous Integration - Gitlab’s article that prompted me to start using this feature.
Gitlab’s Documentation - Goes into a lot more detail on how to write the .gitlab-ci.yml file and the available options.
Building a continuous integration workflow with gitlab and openshift 3 - The author certainly knows a lot more than I do, and details a much more complex setup that also deals with staging and production deployment.